LED Glass Sign Decor
This simple project explains how to craft an amazing illuminated glass decoration design under an extremely low budget.
This glass decoration can be placed on computer tables,office desks,bed rooms or any other suitable place where you prefer.
This beautiful craft is made from a old LED display panel.(LED/LCD monitors are also can be used)
The whole illuminating effect based on the ability of the glass to reflect the light rays uniformly inside it.This effect cannot be gained by using a normal glass or a plastic panel.
LED and LCD monitors use this type of glasses in their backlight unit to produce uniform and smooth light conditions without affecting user eye comfort.
The same purpose can be archived by using a acrylic glass panel, but since I already had a display panel, I used it and the result was amazing.
Tools & Components
1 X Green LED Strip (12V /1ft long)1 X LCD/LED Display Panel
1 X Mounting Box / Stand
1 X 12V Power Supply
1 X White Paper Sheet
1 X Triangle Ruler
1 X Pencil/Pen/Marker Pen
Glue Gun (with 1 Glue Stick)
Sharp Pen Knife/Mini Drill
Connecting Wires
Insulating Tape
Crafting Process
Before beginning the crafting process, keep in mind that the two sides of the glass plane is not identical.You can identify the difference between two sides by touching them.One side is very smooth while the other one is rough.
Note : Always craft on the smooth side.Otherwise the design lines will not be clearly visible.
Step 1 : Preparing Glass Panel
When you retrieve the glass panel from the backlight unit,you have to be very careful not to damage or scratch the surface.It is very important to keep the surface scratch free because it affects the design neatness.Hence, get a piece of cloth and clean the both sides of glass surface gently.
Put a bubble wrap under the glass when you are crafting the design to avoid any harm.
Step 02 : Draw The Desired Design
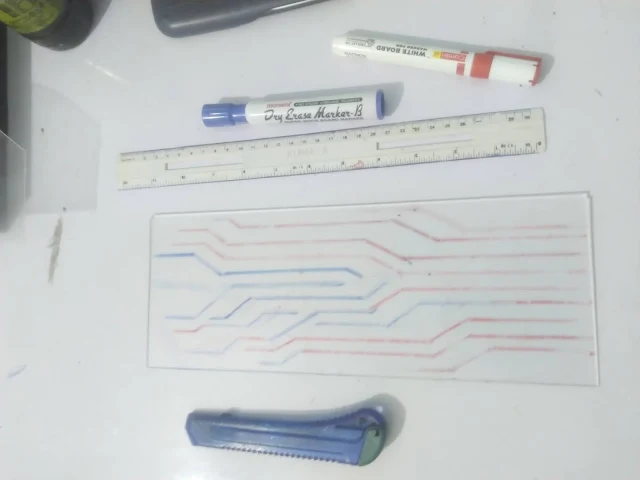
In the white paper sheet, draw the design you would like to craft onto the glass. Use the triangle ruler and a sharp pencil or a pen to draw thin and clear lines(I have used a marker pen and soon realized the mistake that I've made).Step 03 : Prepare For Crafting
Put the glass on the design paper and adjust position as your wish.Now, fix the paper onto the glass using sellotape without compromising the position adjustment which were made earlier.
Step 04 : Start Crafting
Grab the pen knife and start crafting the design on to the glass surface along the design lines carefully.You can use a mini drill with a thin drill bit instead of the knife and it would be much efficient.While crafting, be careful not to harm the other side of the panel.(Use the bubble wrap sheet under the plane)
Step 05 : Finalize The Crafting Process
After you finish crafting, use a piece of cloth and clean the crafted surface gently.Remove the design paper from the panel.
Now the crafting process is over.Check the design for unfinished design lines and fix them.
Step 06 : Light Test
In this step, we are going to test the panel to get the proper illumination required.The square glass panel has 4 sides.Use a LED strip and mount it on to a one side at a time and check for the best illumination that displays the design clearly.
If you used a single backlight panel,then there is only one side which reflects the light rays properly.
If you used a dual backlight panel,then there are two sides which reflects the light rays properly.
If you used a quad backlight panel,then all four sides reflects the light rays properly.
Step 07 : Install the LED strip
Solder 2 wires to the LED strip (+) and (-) terminals.Insulate the exposed terminals after soldering.
After choosing the proper light reflecting side of the panel, install the LED strip onto that side using the glue gun.
Now we have to mount the glass plane on to the stand/mounting box.(Use black glue sticks for better hold)
Connect the 2 wires from the LED strip to the 12V power supply. Be careful about the polarity.Changing polarity would destroy the LED strip.Insulate the exposed terminals.
That's It ! You have made it. Enjoy !!
Safety First !
Always Connect the power supply if you are absolutely sure that the components are connected correctly without changing polarity and short circuited the wiring.
Even if it seems nothing is wrong : DOUBLE CHECK EVERYTHING !!
Your Feedback is very important to us.
Please Leave a comment about how you feel about this project.


hi
ReplyDeletePost a Comment